How to Monitor & Debug Node.js Web App Performance with OpenTelemetry
Inevitably as a Node.js application scales - it’ll start to hit performance bottlenecks such as slow responses and crashes, leading to bad user experiences. However, before jumping to conclusions and trying to optimise performance without measuring, it can be useful to instrument the application to measure the root cause of the performance issues. Otherwise, it might be tempting to put in a new index on a DB when in reality it’s a problem of too many queries being dispatched for a single request (an N+1 problem (opens in a new tab)).
In this guide, we’ll explain why we should instrument our applications to isolate performance issues, how to add instrumentation via OpenTelemetry, and explore a list of common performance issues and how to detect and resolve them.

Why OpenTelemetry for Node.js?

To get started instrumenting an application for performance issues, we’ll need to first choose a way to collect performance information from our application itself. OpenTelemetry is becoming the default choice as it can offer a few advantages over non-standard/vendor-specific instrumentation:
-
Vendor Neutrality: OpenTelemetry is a vendor-neutral framework. That means with it, we can instrument our application once and use the telemetry data with any monitoring tool.
-
Flexibility: OpenTelemetry supports a wide range of programming languages, frameworks, and libraries. It allows us to instrument our applications regardless of the tech stack.
-
Focus on Developer Experience: OpenTelemetry provides great support to collect critical telemetry data such as logs, metrics (numerical timseries data), and traces (events that are linked together).
-
Auto Instrumentation: Manual instrumentation can be daunting and tedious to start off with, so OpenTelemetry offers an auto-instrumentation option to automatically capture performance information from the Node.js runtime and popular libraries (ex. Express, MongoDB, GraphQL, etc).
-
Active Community Support: It has a large and active community of developers that are empowering the product and the community
Installing OpenTelemetry in Node.js
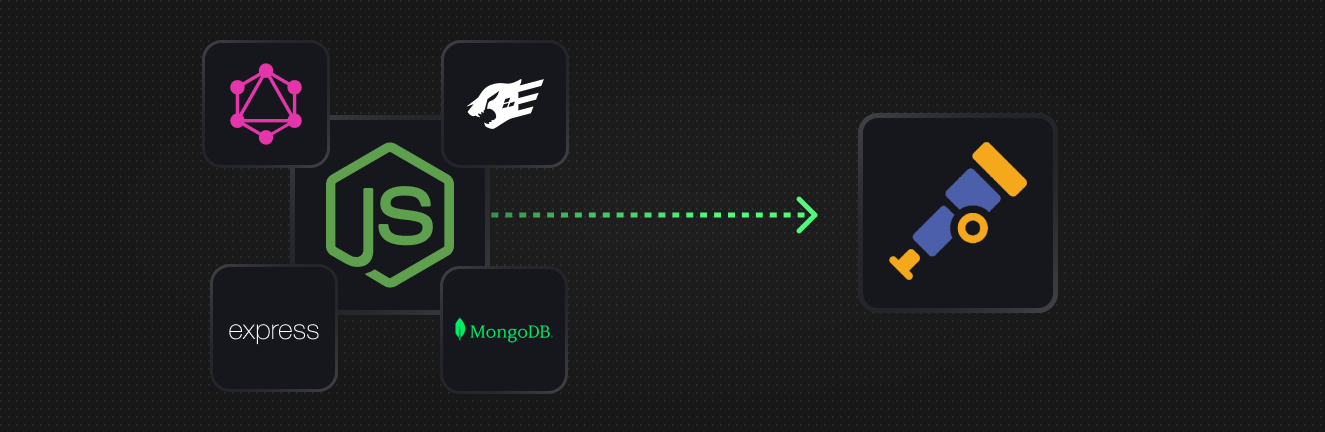
One of the key features of OpenTelemetry is automatic instrumentation which allows us to automatically collect telemetry data from our applications without modifying the source code. Now, we’ll explore the steps to install and configure OpenTelemetry with Auto-Instrumentation in a Node.js environment.
If you're using HyperDX, you can follow the HyperDX version of the install guide here (opens in a new tab).
1. Install Required Packages
First, we’ll install the required packages into a project using npm/yarn.
Using npm:
npm install @opentelemetry/api @opentelemetry/auto-instrumentations-nodeUsing yarn:
yarn add @opentelemetry/api @opentelemetry/auto-instrumentations-nodeThis command installs the following packages:
@opentelemetry/api: Node.js-specific package for emitting instrumentation with OpenTelemetry.@opentelemetry/auto-instrumentations-node: Includes pre-built instrumentation libraries for popular Node.js libraries (e.g., Express, HTTP). You can see the full list of supported libraries here (opens in a new tab).
2. Run Your Application with OpenTelemetry Instrumentation
Afterwards, you can get started by configuring a few environment variables and adding OpenTelemetry as a requirement to your node startup command:
OTEL_TRACES_EXPORTER=otlp OTEL_EXPORTER_OTLP_TRACES_ENDPOINT=your-endpoint \
OTEL_SERVICE_NAME=my-service-name \
node --require @opentelemetry/auto-instrumentations-node/register index.js
Note: This works for alternative entry points as well such as ts-node by just
swapping out node for ts-node or by using --interpreter_args for pm2.
Now that we have OpenTelemetry installed and configured, we can start our application and begin debugging with telemetry data.
(Alternative) Manual Initialization
If you wish to programatically configure OpenTelemetry to customize what
libraries are instrumented or what types of telemetry are emitted, you can use
the @opentelemetry/sdk-node package to initialize the SDK by following the
steps below:
1. Install Required Packages
npm install @opentelemetry/sdk-node @opentelemetry/auto-instrumentations-node2. Initialize OpenTelemetry
After installing the required packages we’ll initialise OpenTelemetry in our Node.js application.
const opentelemetry = require('@opentelemetry/sdk-node');

const {
  getNodeAutoInstrumentations,
} = require('@opentelemetry/auto-instrumentations-node');

const sdk = new opentelemetry.NodeSDK({
  instrumentations: [getNodeAutoInstrumentations()], // Configure exporters and other settings
});

sdk
  .start()
  .then(() => {
    console.log('OpenTelemetry SDK started'); // Start your application
  })
  .catch(error =>
    console.error(
      'Error tracking throw error starting OpenTelemetry SDK',
      error,
    ),
  );
We can also use the shutdown method to gracefully shut down the SDK before process shutdown or on some operating system signal.
const process = require('process');

process.on('SIGTERM', () => {
  sdk
    .shutdown()
    .then(
      () => console.log('SDK shut down successfully'),

      err => console.log('Error shutting down SDK', err),
    )
    .finally(() => process.exit(0));
});
Here we have programatically configured OpenTelemetrySDK to automatically instrument our project's libraries.
3. Configure Exporters
Next up, we'll configure exporters and the required settings. For example, to export traces to a backend system using the OpenTelemetry Collector (OTLP) HTTP protocol, we can install and configure the @opentelemetry/exporter-trace-otlp-http exporter:
npm install @opentelemetry/exporter-trace-otlp-httpconst {
OTLPTraceExporter,
} = require('@opentelemetry/exporter-trace-otlp-http');
const exporter = new OTLPTraceExporter({
url: 'http://localhost:4318/v1/traces', // Replace with your OpenTelemetry Collector endpoint
});
const sdk = new opentelemetry.NodeSDK({
instrumentations: [getNodeAutoInstrumentations()],
traceExporter: exporter,
// Configure other settings
});With this, we have successfully integrated OpenTelemetry with auto-instrumentation into our Node.js application.
Node.js Debugging with OpenTelemetry
Now with our application instrumented, we can dive into the telemetry collected and find the root cause of performance issues and get an overall gauge of performance of the application.
In the following examples, we'll be using HyperDX's open source local mode to analyse/visualise our collected telemetry data. However, with OpenTelemetry you can send your telemetry to any backend/application performance monitoring tool of your choice.
Common Performance Issues and Fixes
Slow DB or Too Many DB Queries
The database is a critical component in any web application; its performance significantly impacts the overall performance of the application. By instrumenting your app's database queries, you can identify slow database queries or excessive database queries with detailed trace analysis
We can also visualize the telemetry data using HyperDX:

With OpenTelemetry, we can easily trace the execution flow of our application and detect potential issues such as inefficient queries, lack of indexing, or unnecessary data retrieval.
To solve these issues, we can take the following steps:
-
Add Indexes: We can find find query patterns that are slow via tracing and check if any of the queries can be optimized by adding indexes to the database tables.
-
Optimize Queries: Identify inefficient queries that perform unnecessary computations. Optimize these queries by refining the query logic, reducing data retrieval, and utilizing database features like projections and filtering.
-
Implement Caching: For frequently accessed data or computationally expensive queries, caching can be an effective solution. Use the trace data to identify such queries and implement caching strategies such as caching in-memory or in caching services such as Redis to reduce database load and improve response times.
-
Parallelize or Batch Queries: Improve performance by executing multiple queries in parallel or batching related queries together. Telemetry data can highlight opportunities for parallelization or batching, leading to more efficient database interactions.
Note: While parallelizing or batching can improve performance for small to medium-sized queries, large and expensive queries may overload the database and degrade its performance.
Blocking Operations and Event Loop Lag
In Node.js applications, the efficiency of the event loop is crucial for optimal performance. Blocking operations or event loop lag can delay request handling and degrade responsiveness.
OpenTelemetry provides insights into event loop utilization (opens in a new tab) and CPU utilization to help identify when the Node.js server is saturated with work.
To address these issues, you can take the following steps:
-
Streaming Data: If you're loading or processing large datasets, consider streaming data instead of loading the entire dataset into memory. Streaming breaks data into small, manageable chunks, reducing memory usage and improving performance, especially for large databases.
-
Asynchronous Programming: Convert synchronous code calls that block the event loop into asynchronous ones if possible (ex. using the async version of a function call). This allows the event loop to continue processing other events while tasks are ongoing, enabling the application to handle multiple requests concurrently and improve overall performance.
-
Using Worker Threads: In a single-threaded environment like Node.js, CPU-intensive tasks can block the event loop and prevent other requests from being served. You can utilize worker threads (opens in a new tab) to perform these tasks in separate threads of execution, allowing the main thread and event loop to function properly without delays.
-
Identify and Optimize CPU-Intensive Operations: Adding high-resolution timing logs to your code can help identify CPU-intensive application code. By measuring the execution time of specific code sections, you can pinpoint areas that need optimization.
For example:
const start = performance.now();

// Critical code section

const end = performance.now();

const duration = end - start;

console.log({
  message: 'Critical code section executed',
  took: duration,
});
Note: Though this process is helpful, It can generate a large volume of logs, potentially impacting performance itself. It should be sparingly used in production.
Handling Slow External API Calls

Web applications often rely on external APIs for data retrieval, integration, or third-party services. Slow API calls can significantly impact overall application performance, leading to poor user experiences. With telemetry data, we can identify the reasons behind these performance issues.
By tracing API calls, we can measure the latency of each call, detect errors, and assess the impact of these external API calls on the application's overall performance.
To improve performance in such scenarios, consider the following steps:
-
Caching: For frequently used static data, implement caching to reduce the number of API calls and decrease response times. Telemetry data can help identify which API calls can benefit from caching.
-
Batching: When multiple API calls are made within a single user request, batch these calls into a single request to optimize performance.
Note: Not all APIs support batching. Check the API documentation to see if batching is supported.
-
Parallelization: If API calls are independent of each other, execute them in parallel to optimize performance (ex. use
Promise.allinstead of waiting for one after the other).
Bonus: Client/Browser Side Performance Monitoring
While server-side data provides valuable insights, it's also crucial to consider the client-side performance of our web applications. Slow client-side rendering or blocking the main thread can significantly impact user experience even beyond a slow Node.js HTTP server can.
By integrating OpenTelemetry into client-side code, we can gather metrics and traces directly from the browser. This telemetry data helps us address client-side issues such as slow network calls, inefficient rendering processes, or poorly optimized JavaScript code.
By analyzing client-side telemetry data, we can:
-
Optimize Network Calls: Identify slow network calls and optimize them through caching, resource bundling, or code splitting for improved performance.
-
Optimize JavaScript Execution: Detect and optimize slow-running JavaScript event handlers to keep the app responsive to user input.
-
Improve Rendering Processes: Identify inefficiencies in the rendering process and make necessary adjustments to ensure smoother client-side performance.
Monitoring and Alerting
In addition to debugging performance issues, we can also integrate OpenTelemetry with monitoring tools like HyperDX to be proactively alerted on issues insetad of reacting to user feedback.

By collecting and analyzing telemetry data continuously, we can:
- Set up performance monitoring dashboards to visualize key metrics and traces.
- Define alert thresholds for critical performance indicators.
- Receive notifications or trigger automated actions when performance issues are detected.
With proactive monitoring and alerting, we can identify performance issues before they affect the users.
Conclusion
In this blog post, we have explored the advantages of OpenTelemetry, how to install and configure it with auto-instrumentation, and how it helps debug common performance issues.
By Following the techniques and best practices mentioned in the blog, we can use OpenTelemetry and tools like HyperDX to get insights into our application's performance and fix potential issues.
If you're interested in trying out HyperDX, you can sign up (opens in a new tab) for free, schedule a call (opens in a new tab), or check out our project on GitHub (opens in a new tab).